This document outlines the process of creating, signing, and using certificates with VShell's FTPS or HTTPS services. The first step is to create the certificate file and the certificate signing request (CSR) file. The second step is to send the certificate's .csr file to a certification authority (CA) to be signed. The third step is to put the signed certificate into place on the VShell server. The last step is to configure VShell to use the .pfx file for desired FTPS and HTTPS listening address interfaces.
This information applies to VShell for Windows, specifically:
An existing certificate may be used in VShell for FTPS or HTTPS connections as long as the existing certificate meets the following requirements:
If you do not already have an existing certificate for use with VShell for FTPS/HTTPS connections, VShell provides you with the ability to create a self-signed certificate. When a certificate is created by VShell, a corresponding certificate signing request (CSR) file is automatically generated to facilitate the process of having your certificate signed by a trusted third party (such as VeriSign, Entrust, Thawte, etc.). The .csr file is stored in the same location as the PKCS #12 certificate file created by VShell.
To create a certificate in VShell:
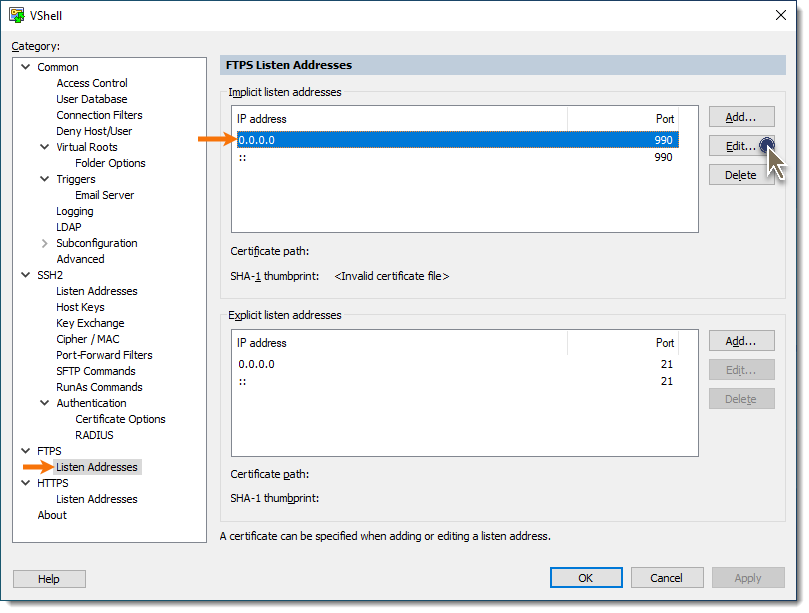
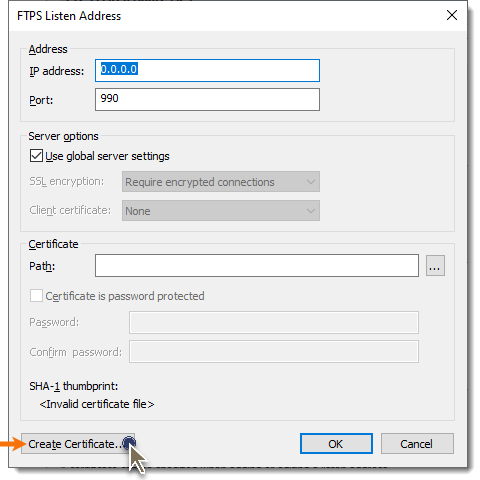
d. In the Listen Address window, press the Create Certificate... button.
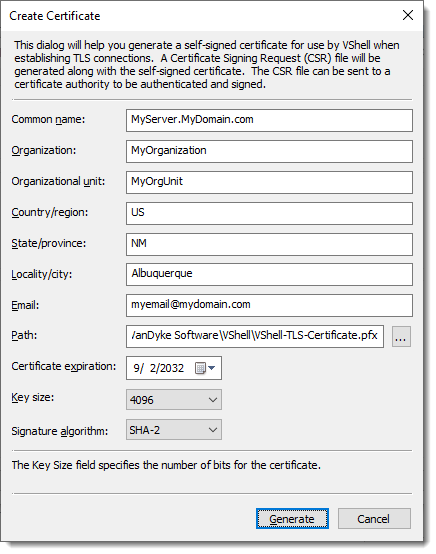
e. In the Create Certificate window, provide the requested information specific to the certificate that will be created. The Common name field must be specified as the fully qualified host name or IP address that FTPS/HTTPS clients will use when they connect to VShell; otherwise, client-side certificate validation will fail.
For example, if the VShell machine is known from the outside as MyServer.MyDomain.com, the Common name must be entered as MyServer.MyDomain.com, and all clients must use this fully qualified name when connecting to VShell.
f. The Path field must also be specified, as it determines where the certificate will be stored, and under what file name. When specifying the file name of the certificate, be sure to include a .pfx file extension so that the file type will be known to Windows (using a .pfx extension facilitates any other operations you may need to perform within Windows, such as viewing or importing the certificate into the MS CAPI store if desired). For example:
When the Common name, Path field, and optional certificate fields have been specified, press the Generate button.
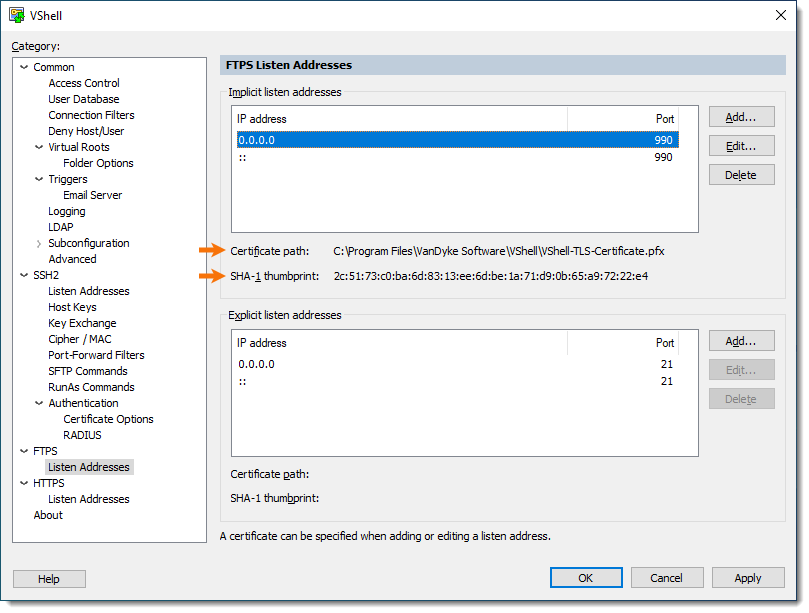
g. Once the certificate has been created, the Listen Address window will show the Certificate path and SHA-1 thumbprint of the newly-created certificate. Press OK to return to the VShell Control Panel.
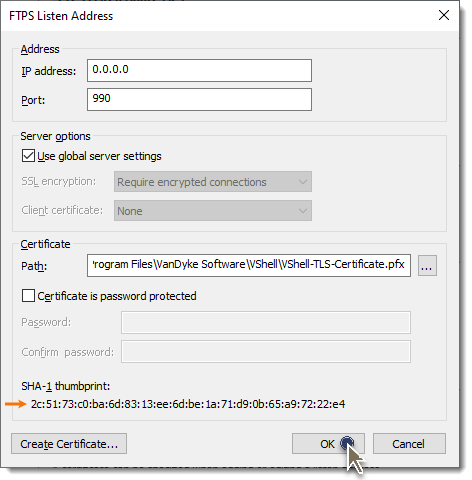
h. In the VShell Control Panel, the corresponding Certificate path and SHA-1 thumbprint should now be displayed when selecting the associated Implicit listen addresses.
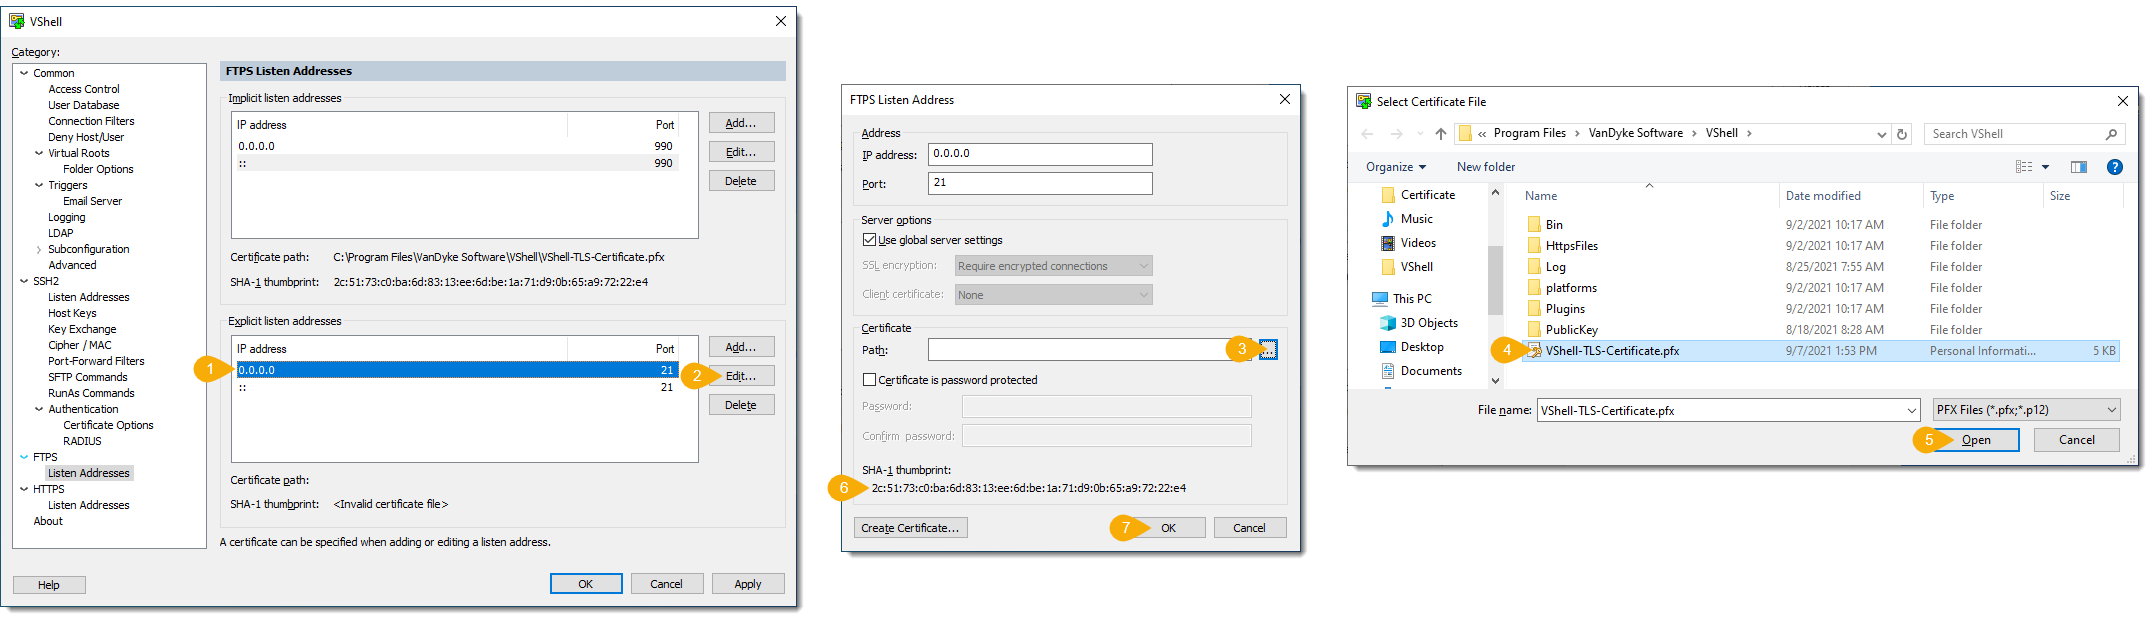
i. In the folder where the certificate file (VShell-TLS-Certificate.pfx) is located, you will find a .csr file with the same base name as the certificate. This file is automatically created by VShell to facilitate having your certificate signed by a trusted third party organization, if desired. For this particular example, the filename is:

Once a certificate has been created by VShell, along with the corresponding Certificate Signing Request (CSR) file, you may desire a third-party trusted signature be applied to your certificate in order for clients and business partners to "trust" your certificate.
To obtain a third-party signed certificate, submit the .csr file to the Certification Authority (CA).
Do not submit your .pfx file for signing – the .pfx file contains the certificate's private key, and must be kept private.
There are a number of third-party CAs that can be used to obtain a signature based on the .csr file. The organization that will sign the request should provide instructions on how to successfully submit your CSR file.
Alternatively, if FTPS or HTTPS connections will only be made by clients internal to your organization, and your organization uses Microsoft Certificate Services, you may be able to obtain a signed certificate through the use of the Microsoft Certificate Services website local to your organization.
The Certification Authority to which the CSR file was sent will provide a "trusted" (third-party signed) certificate, which is basically the public portion of your original self-signed certificate, signed by a trusted certificate belonging to the third party organization. This file may come in the form of a CER file (e.g., mycert.cer) or even as text within the body of an email message, requiring you save the text contents to a .cer or .crt file. Regardless of the delivery format, you must complete the following steps in order to configure VShell to present the trusted/signed certificate when FTPS/HTTPS clients connect:
Store the third-party signed version of your VShell certificate (e.g., the file with the .cer or .crt extension in the name) in the same folder as the PKCS #12 (.pfx) certificate file VShell is currently configured to use (as indicated in the FTPS / Listen Addresses or the HTTPS / Listen Addresses category of the VShell Control Panel).
Note: The third-party signed certificate must be stored as a file with a .cer or .crt extension, and this file must be placed in the same location as your PKCS #12 file that's specified in the Certificate path (located in the VShell Control Panel FTPS / Listen Addresses category or the HTTPS / Listen Addresses category). The base name of the .cer or .crt file must match the base name of the .pfx file VShell is configured to use (underlined in the example below).
For example, your VShell Certificate path might be configured to have the following certificate file associated with an FTPS or HTTPS listen address:
C:\Program Files\VanDyke Software\VShell\VShell-TLS-Certificate.pfx
With VShell configured as in the example above, you will need to save the third-party signed version of your certificate (the .cer or .crt file provided to you by your certification authority) to the following path and file name:
C:\Program Files\VanDyke Software\VShell\VShell-TLS-Certificate.cer
VanDyke Software uses cookies to give you the best online experience. Before continuing to use this site, please confirm that you agree to our use of cookies. Please see our Cookie Usage for details.