VanDyke Software

Tips

Index

Making Configuration Changes to Multiple Sessions

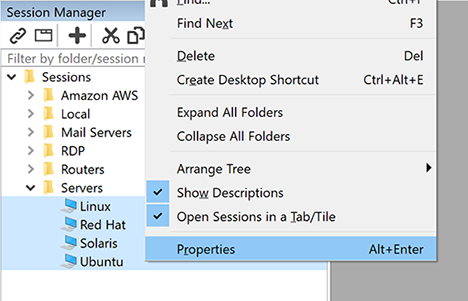
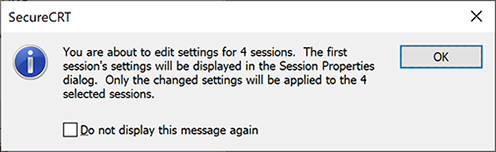
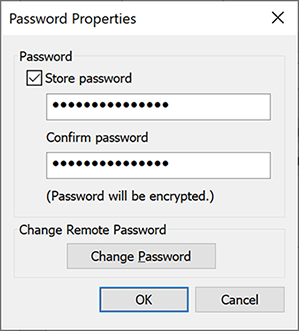
In this tip you'll learn how to make sesion configuration changes to multiple sessions.

There are many times when this can be useful, for example when changing a firewall configuration or changing a saved password that is used in multiple sessions.

Note: To change the default settings for new sessions and then apply the changes to all existing sessions, see the tip, Changing Default Settings for New and Existing Sessions.

Here are the steps you use to apply configuration changes to multiple sessions.

  1. Open the Session Manager and select the desired group of sessions by holding down the CTRL key while clicking on each session with the mouse.

    You can also right-click on a folder within the Session Manager to change properties for all sessions within that folder. If you want to make changes to all existing sessions, right-click on the Sessions folder itself.

  2. Right-click on one of the selected sessions (or the selected folder) and choose Properties from the context menu.
  3. SecureCRT Session Manager Properties
  4. A notification will appear, asking you to confirm that you want to apply changes to the selected sessions.  Press the OK button to continue.
  5. SecureCRT session edit notification to confirm changes
  6. The Session Options - multiple window will appear. Make the desired changes to the configuration (for example, changing or setting the SSH2 password as in the screen shot below).
  7. Once you have made the desired changes, press the OK button in the Session Options - multiple window to apply the modifications to all the selected sessions.

VanDyke Software uses cookies to give you the best online experience. Before continuing to use this site, please confirm that you agree to our use of cookies. Please see our Cookie Usage for details.