Index
How to Configure Trace Options and Debug Logging in SecureCRT®
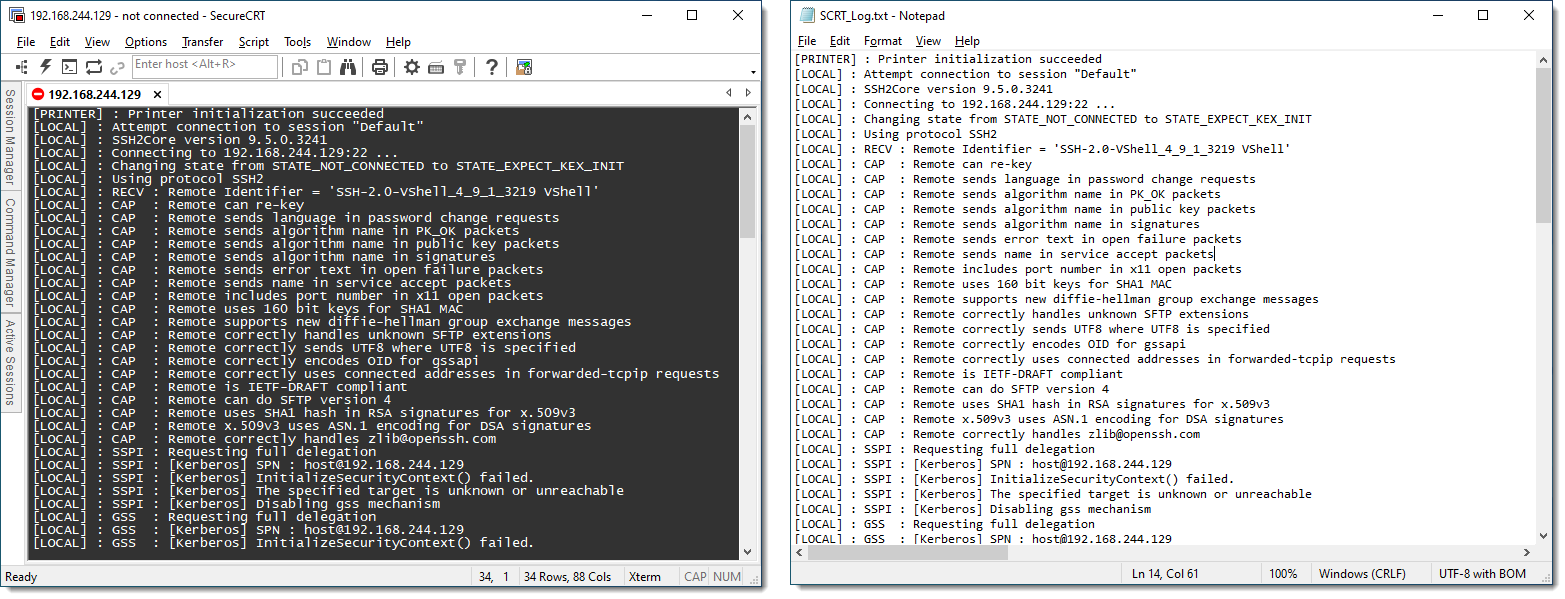
SecureCRT can be configured to display and log debugging information in order to help troubleshoot connection or authentication issues.
These steps are also demonstrated in the YouTube video, Trace Options Debug Logging in SecureCRT.
Here are the steps for configuring trace options and debug logging:
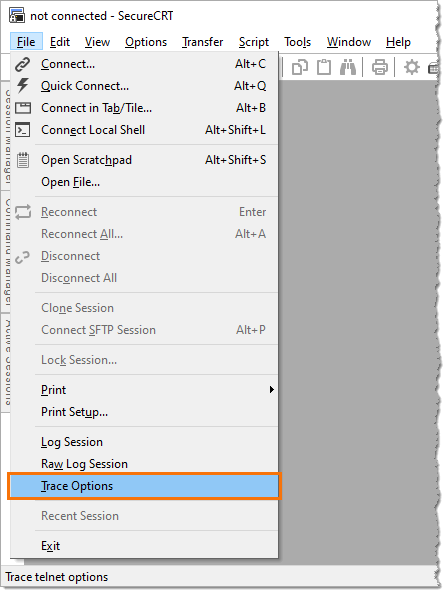
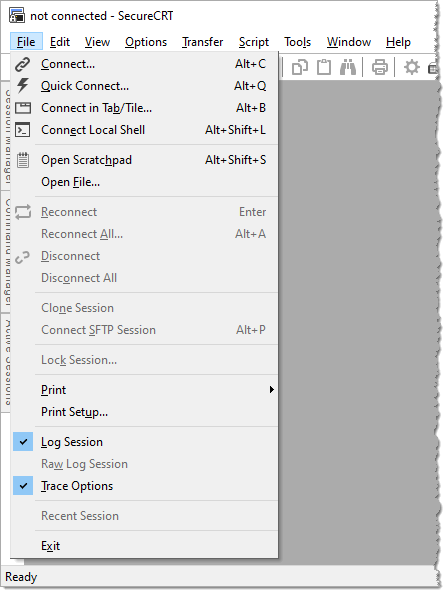
- Launch SecureCRT, open SecureCRT's main File menu, and then select the Trace Options menu item.
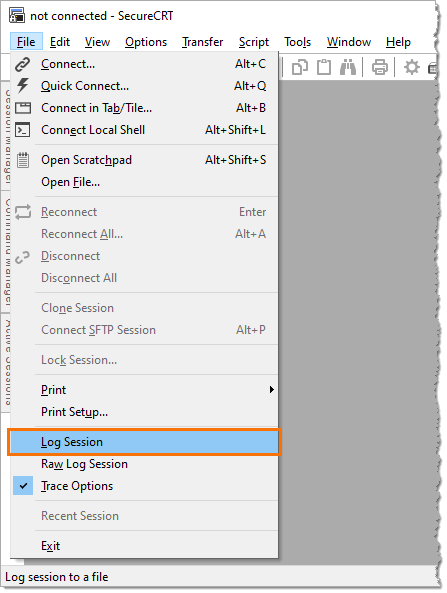
- Open the File menu again and select Log Session.
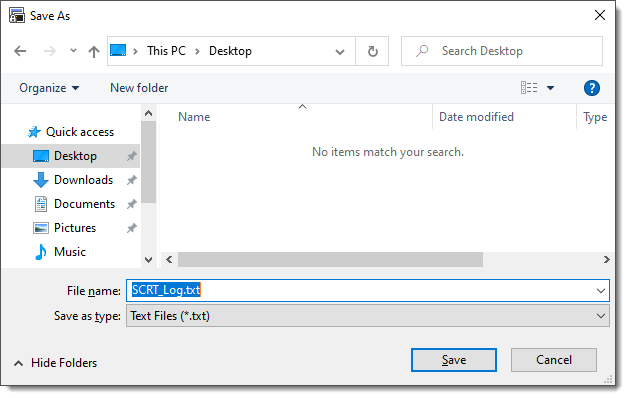
- When the Save As dialog appears, specify a path and name for the log file to which SecureCRT should write. Select your Desktop folder or another folder of your choice and a name for the log file, such as SCRT_Log.txt.
For example, if you're on Windows:
%USERPROFILE%\Desktop\SCRT_Log.txt
For example, if you're on macOS or Ubuntu:
~\Desktop\SCRT_Log.txt
Note: If the Save As dialog does not appear for you, it means that your Default session has a value already specified in the Log file name entry box. In this case, refer to the value of the Log file name setting in the Log File category of the Default session (Options / Configure / Default Session...) to know where to find the resulting log file.
If you click on the File menu again, you should see a checkmark to the side of both the Log Session and Trace Options menu items, indicating these options are currently active.
- Enable packet-level logging and timestamps (optional or if requested by VanDyke Software technical support).
- Navigate to the Log File category of the Session Options dialog before attempting to establish any connections in the SecureCRT application.
- If establishing an ad hoc connection (from SecureCRT's Quick Connect dialog, for example), choose Options / Configure / Default Session...
- If establishing a connection via a saved session, right-click the saved session entry in SecureCRT's Session Manager and choose Properties.
- Enable the Timestamp each line option and increase the Trace level option to 9.
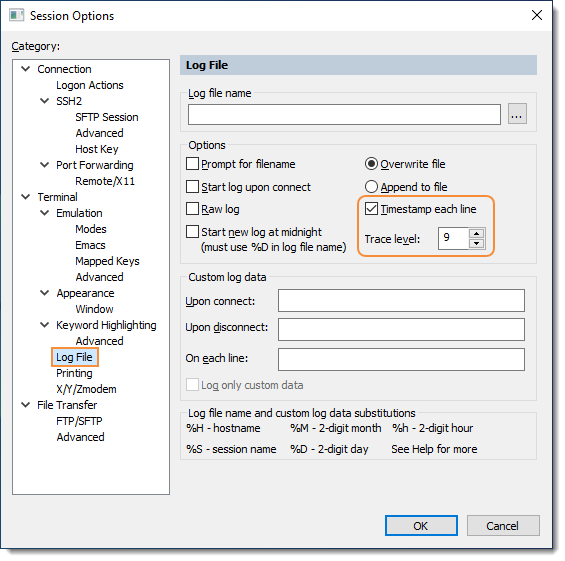
- Press the OK button.
Note: If you are editing the Default session, you'll be prompted to apply these changes to the Default session only or to all existing sessions. Choose Change Default session only.

- Attempt the connection. Debug information should now be displayed in the terminal window and, with logging enabled, the information will also be written to the log file specified earlier.